
GRP Driveway Markers: Planning the Winter Delineation Route
A GRP driveway marker is the same pultruded glass-composite post sold elsewhere as an FRP or GFRP snow stake. This page is not a rod catalogue: it is the operations brief a winter-maintenance planner needs — how to calibrate a delineation route, how many posts a kilometre actually consumes, when to drive and pull them, and how the post must behave when the plow passes.
The post itself comes off our pultrusion line; the decisions below are about managing the route, not the laminate. Every spacing, height and stock figure is a typical planning starting point to be adjusted to your road class, snow climate and local maintenance norm.
All spacing, density and height figures on this page are typical planning values. Confirm the final layout with our engineering team and fix it on the approved order drawing.
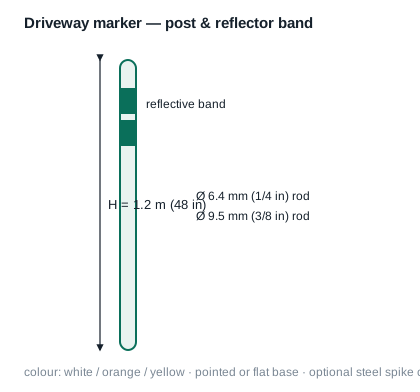
Calibrating the route: where each post point actually goes
Laying out a delineation route starts from the machine that clears it, not from a uniform spacing rule. The snow plow blade has a known working width, and the post line sits just outside the blade's swept path on the shoulder. A planner walks the route once in dry weather and fixes point positions against three physical references: the shoulder width, the curve radius, and any bridge parapet or culvert inlet where the blade turns in.
On a straight rural road the points can follow a simple sightline rhythm. On a curve the spacing tightens so a driver or a plow operator always sees the next post before the bend tightens. At bridge ends, culverts and private driveways the posts are brought closer together because that is exactly where a driver needs the edge of the road most.
- Fix the post line just outside the plow blade's swept shoulder path, measured from the blade working width.
- Tighten spacing on curves so the next post is visible before the radius tightens.
- Cluster posts at bridge abutments, culvert inlets and private driveway crossings.
- Mark low dips and hidden access tracks that disappear under drifted snow.
Working out how many posts a kilometre consumes
Ordering by the box rather than by the route is the most common way a depot over-buys or runs short. The planning estimate is a simple build-up from spacing: posts per kilometre equals one thousand divided by the centre-to-centre spacing in metres, plus an allowance for points that cannot follow the rhythm — curves, crossings and transitions.
As a worked example: a straight section on a 10 m rhythm needs roughly 100 posts per kilometre; a curved section on a 5 m rhythm needs about 200. Add a damage allowance for posts knocked out, grazed by graders, or lost at the blade, and carry that allowance as shelf spares rather than a second delivery in mid-winter.
The planning rule is posts/km = 1000 / spacing in metres, plus extra for non-rhythm points and a damage allowance. We quote posts by height and diameter; we do not publish a unit price on this page.
Seasonal installation and removal windows
Because the posts are driven into live shoulders, the schedule follows the ground. Crews install once the soil has cooled but before the first persistent snow line, and pull them out as spring thaw loosens the shoulder. Driving into fully frozen ground forces pilot holes; pulling while the ground is still firm prevents posts being left in the mud ahead of mower season.
Planning the window matters for labour. A kilometre installed in firm autumn soil is a short day for a two-person crew; the same kilometre drilled into frozen ground is a day and a half. Spares, band-facing checks and spacing re-inspection are best done in the same pass as the install, not returned to later.
Why the post flexes, and where the blade must not reach
A marker post that does not bend is a hazard, not a warning. When the plow blade glances a post at working speed, the post must yield elastically and return upright once the blade has passed. A rigid steel post either stays bent or becomes a flying bar; a brittle plastic post shatters. The pultruded glass-composite rod flexes through the blow and recovers, which is why it is driven just outside the swept path rather than on it.
The shoulder offset is therefore a planning decision, not a cosmetic one: the row is placed so the blade's outer edge passes beside, not through, the line. The reflective band sits at a height chosen above the expected plowed snow surface so it catches headlamps at night; its placement matters as much as its brightness, because a row of over-bright posts can dazzle drivers on an unlit bend.
- Place the row outside the blade's swept path — the flex is a safety margin, not the main protection.
- Set the reflective band above the expected plowed snow depth, not at ground level.
- Keep band height consistent so the driver reads one continuous line of light.
- Avoid over-bright placement that becomes glare on dark curves.
GRP markers against wooden and steel posts over one winter
Maintenance crews compare three post types on the metrics that matter across a season: how many times a post can be driven and pulled, what a broken post costs to replace in labour, and what happens to it at the end of its life.
| Post type | Seasonal reinsertion life | Broken-post replacement | End-of-life handling |
|---|---|---|---|
| Wooden stake | Splits and loosens after one or two seasons | Cheap post, but digging out the splintered stub is slow | Rots in the ground; treated timber carries preservative |
| Steel rod | Bends permanently on a hard hit | Straightening or swapping costs labour; rust at soil line | Rust staining; magnetic pickup in the verge |
| GRP composite post | Flexes and recovers across many seasons | Light post, swapped in seconds, no stub left | Non-rusting, non-rotting; residual goes to composite scrap |
The comparison is about whole-season maintenance effort, not purchase price. GRP wins on the repeat labour of reinsertion and on leaving no rusted or rotting stub behind.
Ordering by route: what the buyer specifies
A route order is built from three numbers: total route length in kilometres, the point density (spacing in metres) on straight and curved sections, and the post height for the expected drift depth. The reflective film grade is not something we dictate: the buyer's local maintenance norm names the retroreflective class, and we supply the band to that grade.
What we need on the schedule is height, rod diameter, colour, band width and tip type (plain taper or steel-core spike for stony soil). We quote against the approved drawing; we do not supply certified retroreflectivity numbers we have not measured, and we do not put a third-party report number on a post that belongs to another product line.
GRP and FRP are two names for the same pultruded composite
Drawings and purchase orders carry several labels for the rod on this page, and they mean the same thing. GRP is the term used across the UK, Ireland and much of European engineering; FRP is the general family name common in North America; GFRP narrows the family to glass fibre. On a pultruded marker rod, all three point to continuous glass rovings in a cured polyester matrix.
The height, the rod diameter, the reflective band and the flex-and-recover behaviour do not change with the word on the order. A UK maintenance depot asking for GRP delineator posts and a North American contractor asking for FRP snow stakes are quoted on the same basis — by route length, density and height, not by the acronym.
Three layout mistakes crews correct after the first snow
Most winter marker failures are installation errors that only show up once the snow flies. The three that recur every season are buried too shallow, the band facing the wrong way, and uneven spacing that breaks the sightline.
- Buried too shallow — the post leans or pulls out in the first grader pass. Drive deeper into firm soil and re-check the row after the first plowing.
- Band facing the wrong way — the reflective film points into the verge instead of toward approaching traffic. Turn the band to face the travelled lane.
- Uneven spacing — a row that jumps from 4 m to 12 m breaks the continuous line the driver reads. Re-measure from one fixed reference along the whole route.
Acceptance: what we ship and what we certify
Each delivery is strapped by height and diameter and marked with size, colour and lot. With it you receive the approved drawing and a dimensional check; we hold ISO 9001 under registration 01708Q11888R0S. We are explicit about limits: we do not claim a certified retroreflectivity distance, a guaranteed bend moment, or any third-party product certification we do not hold — send us the local maintenance norm and we supply to it.
GRP driveway markers — frequently asked questions
How many GRP marker posts do I need per kilometre?
What height post do I need for my drift depth?
Why does the marker post need to bend at all?
Is a GRP driveway marker the same as an FRP snow stake?
Who specifies the reflective band grade?
How deep should the posts be driven?
Related pages
- FRP grating — open mesh for works yards and depots
- Pultruded FRP profiles — the same line, different section
- FRP driveway markers — the product specification view
- Applications by industry
- Contact us with your route schedule
Send the route schedule, not a catalogue number
Give us total route length, spacing on straight and curved sections, post height and the reflective grade your local norm requires. We answer with a layout, a posts-per-kilometre estimate and a lead time.